
Hello folks, I just recently installed OPNSense as my firewall/router for my home network. It has been kind of an adventure compared to my TP-Link Deco I had as my router before.
One challenge I’ve run in to was how to get UPnP working. Yeah yeah… I know… Why have a firewall if you want to enable UPnP. Well… to be honest… I just want my Xbox’s to work. One thing with OPNsense is that it can be really difficult to find the right answers on how to configure something especially since most posts are related to older versions of OPNsense that don’t match up with whats in the UI today. So I’m going to tell you how I got UPnP working in my (as of today) 26.1.3 OPNsense install.
Install UPnP Plugin
- Navigate to System -> Firmware -> Plugins
- Look for os-upnp and click the plus sign on the right side of the page
- You might need to check the “Show community plugins” box to see the plugin. (I don’t remember)
Recommendations (Optional)
- To improve security, set the devices that you want to use UPnP to static IPs so you can limit UPnP usage.
- Create an Alias for your devices that you want to enable UPnP on (if you created a Static IP for each one of them)
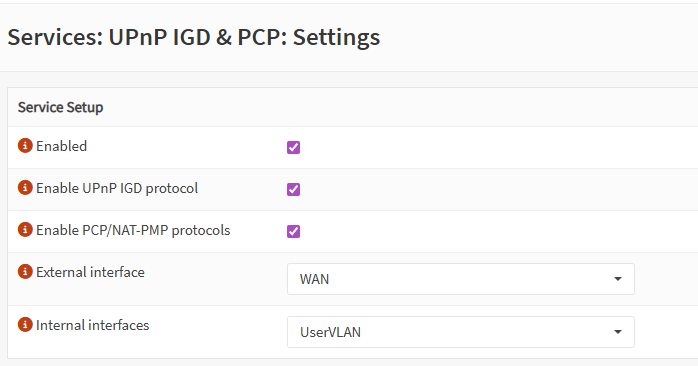
Configure UPnP IGD & PCP
- Navigate to Services -> UPnP IGD & PCP
- Click Settings
- Enabled – Checked
- Enable UPnP IGD protocl – Checked
- Enable PCP/NTP-PMP protocols – Checked
- External Interface – WAN (or whatever your external interface is)
- Internal Interface – LAN (or if its a VLAN, set it to that. You can set multiple internal interfaces)
- Skip Advanced Settings
- Skip UPnP IGD Adjustments
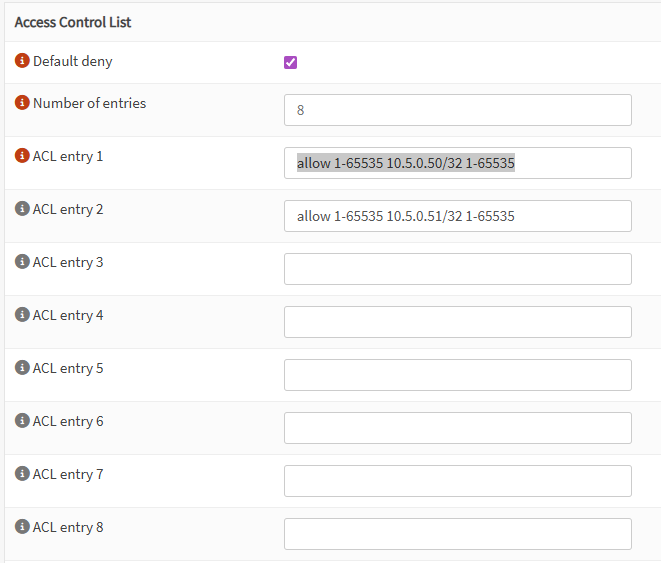
- Under Access Control List (The following settings are optional but go in hand with the above reccomendations)
- Default Deny – Check
- Number of Entries – Set to whatever you need
- ACL Entry 1 – Enter allow 1-65535 <IP-ADDRESS>/32 1-65535 Replace <IP-ADDRESS> with the Static IP of your device. Repeat this in the following ACL entries for each device.
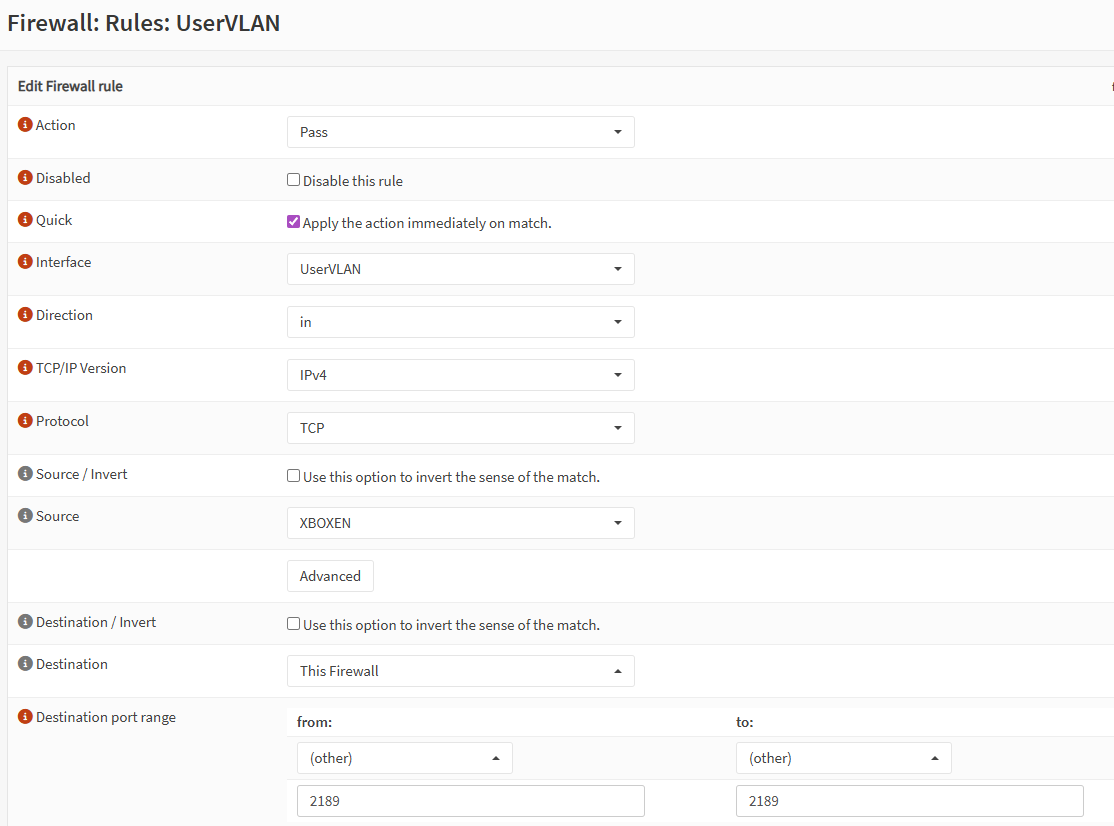
Configure Firewall
- Navigate to Firewall -> Rules -> <The interface your UPnP client(s) live on>
- Click the plus sign to add a rule
- Action: Pass
- Interface: Choose the same one you click on before after Rules
- Direction: in
- Protocol: TCP
- Source: I set mine to an ALIAS of my Xbox’s
- Destination: This Firewall
- Destination port range: 2189 to 2189
- Click Save at the bottom and then Apply at the top of the Rules page

Verifying if it worked
- Navigate to Services -> UPnP IGD & PCP -> Active Maps
- You should see a mapping if your device can activate UPnP
- If it doesn’t work, you might need to add additional firewall rules. Go check the live view (Firewall -> Log Files -> Live View) for your device and see if some additional ports are being blocked. I’ve seen some guides the suggested multiple ports had to be opened, but I found I only needed to add this one.
